top of page

Photo Album
Pictures taken during the construction of Determination. The first five pictures are of the construction materials, and the design. The rest are in chronological order.
 11/08/2012Raw material #1: 23,453 pennies |  11/08/2012Raw material #2: 20 2x4s, 2 4x8 sheets of 3/4" plywood, 132 feet of 1x4 maple |  12/10/2012Raw material #3: 32 sq ft of acrylic sheet, 18 ft of acrylic half-round |
|---|---|---|
 12/21/2012Raw material #4: two panes of low-iron plate glass, 3/8" thick, roughly 7' x 4'. These weigh 150 lbs each! Before they arrived, 150 was just a number. Now it's a crushing reality. |  11/09/2012That's the design on the left, the project plan on the right. |  11/08/2012step 1 - Make three new sawhorses. |
 11/08/2012step 2 - Glue maple together into 4x4s. There will be two about 7 feet long, two 4'6". |  11/17/2012step 3 (after gluing) - Plane and trim the 4x4s. The long ones weigh 28 lbs each, the short ones 18. |  11/21/2012Testing a butt joint with a cross dowel nut. I haven't used this kind of nut before. It is unbelievably strong. |
 11/28/2012step 4 - Butt joints. I got the first one done tonight. |  11/28/2012There are three bolts... |  11/28/2012...screwed into three cross dowel nuts. This is an INCREDIBLY tight butt joint. |
 11/30/2012Done with the butt joints. |  11/30/2012 |  11/30/2012 |
 12/08/2012I already gave one grocery bag of sawdust to my neighbor for his bonfire. Here are two more. On a project this size, you start to wonder how much you spent on sawdust. |  12/08/2012step 5 - Cut a groove for the glass, and round off the edges. |  12/08/2012 |
 12/08/2012 |  12/08/2012Had to put it together another time... |  12/08/2012...just to finish rounding that corner accurately. Here's before... |
 12/08/2012...and after. (the burn marks will sand out) | 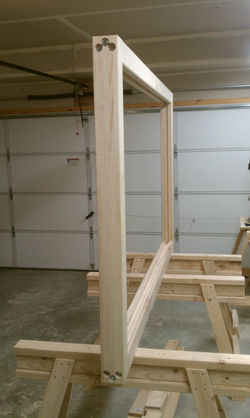 12/08/2012 |  12/08/2012Done building the frame. Still need to sand and finish. |
 12/03/2012step 6 - Make a platform of 3/4" plywood, braced with 2x4s. |  12/03/2012Need the platform under the glass during final assembly, so I don't have to worry about how much weight/stress the glass can take. | 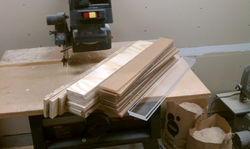 12/16/2012step 7 - Cut the acrylic sheets into 3" wide strips. (Most still have the paper backing on them.) These strips fit better in the drill press. The acrylic will be clamped to a plywood strip while I drill out the disks. This is just one out of the four 2'x4' sheets of acrylic. |
 12/21/2012Done cutting the acrylic strips. |  12/16/2012step 8 - Drill disks out of the acrylic. I need over 4000 of these. I estimate it will take 100 hours. |  12/16/2012 |
 02/11/2013You read that correctly. I need over 4000 of these disks. What you see pictured here, I have to do 64 times. A little over 2 hours each time, so almost 150 hours of labor, just for the disks. |  02/12/2013Each 2-liter bottle holds 512 disks. Three bottles done, five more to go. |  03/21/2013I'm half done with the acrylic disks. The current plan is to work on this project for 1-2 more weeks. Then I'll put it all away and pick it up again in October. |
 03/27/2013step 9 - Sand the frame. (Actually did the sanding in the garage. This picture is in my spare bedroom, after sanding, getting ready for staining.) |  03/29/2013step 10 - Stain and finish the frame. The only way to stain a 4x4 evenly, apparently, is to stand them on end. |  04/07/2013Done with the finish. |
 04/09/2013Need to get the glass and frame out of the way for a few months, while I work on the disks. I put the frame together with both panes of glass inside. | 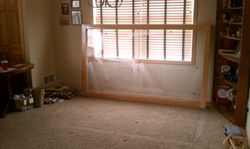 04/09/2013Then I lifted it up and leaned it against the dining room window, out of the way. That thing weighs 390 pounds! | 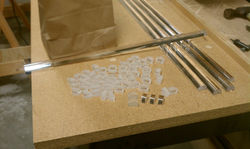 04/15/2013step 11 - Cut the acrylic half-round. Only need about 350 of these. I'm cutting them with a band saw. (not pictured) They will be the outside row around the rest of the acrylic. They will be covered up by the frame, so I can leave the faces rough. |
 05/05/2013step 12 - Sort the pennies by color. Shown here in various stages. I dump out 100-200 pennies, and do a pre-sort into shiny, dark, and in-between. Then I hold each penny up to the "spectrum" in front, and toss it in a cup. This is - by far - the most boring, miserable part of the project. |  05/26/2013Testing the colors. | 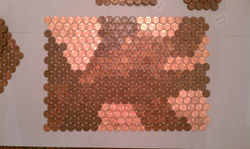 05/26/2013This isn't good enough yet. The borders from Tennessee to Missouri, Mississippi, and North Carolina are the hardest part of the map. But that's why we do tests, eh? The rest will look good. |
 06/25/2013Another color test, a month later. This is about 2/3rds actual size, and just one layer thick. I thought I was done sorting the heads... |  06/25/2013...but it looks very different depending on the lighting and the viewing angle. The previous picture was natural light, and almost overhead. This one has the lights on, blinds closed, and much lower angle. Still needs a few tweaks. | 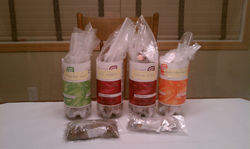 08/04/2013Approximately 85 hours later, by stopwatch, 5 months on the calendar, I'm done sorting the heads. I hope to sort the tails in about 50 hours this fall, then 75 hours drilling the rest of the acrylic disks this winter. Then I can assemble it in the spring! Two years in the making! |
 09/15/2013Done sorting tails! Done sorting, period! | 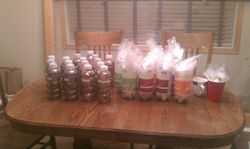 09/15/2013The pennies in the middle, in baggies within bottles, are sorted by color, and carefully counted into 50 bags of heads and 50 of tails. They will be the front and back layers of the map. The ones in the bottles on the left will be the middle, mostly unseen layers. The ones on the right are extra. |  09/16/2013 |
 01/10/2014Haven't posted in here for a while, but I'm still making slow progress. Pictured here is the second half of the acrylic strips. There are 27 strips in the three stacks on the right. Each has one row of disks drilled down the center. The stack on the left is 6 more odd-sized pieces. I'm going to drill out the stack on the left next. Then I'll do two more rows on the other 27 strips, one row on either side of the center. About 35 hours of drilling left, and 25 hours of filing. (sigh) |  02/06/2014Done drilling and filing the stack of odd-sized pieces on the left. That's 473 disks. It took 22 hours, spread out over 28 days. There are 27 strips in the other three stacks. I will drill 44 more disks out of each strip, so 1188 left. (heavy sigh) |  02/13/2014I'm sick of drilling and filing, so I'm setting up my living room for the final assembly. This is exciting! Giving up the living room for at least three months. (I still have 6-8 weeks of drilling to do.) |
 02/13/2014I'm tipping these up about 2 degrees, to get a little help from gravity to keep the pennies tight together. |  02/13/20142 degrees |  02/13/2014Plywood platform. |
 02/13/2014Bed sheet on the platform, to keep the glass from getting scratched. |  02/13/2014I stood that up against the wall about 10 months ago. Just set it back down tonight. 390 lbs! |  02/13/2014Taking the frame apart. |
 02/13/2014I flipped that top piece of glass over onto the floor, but I shouldn't have done it by myself. Scraped my arm. |  02/13/2014Going to have a bruise there tomorrow. But no broken bones, and no broken glass. |  02/13/2014Leaned the glass up against the frame, but I can't figure out how to get it up onto the platform by myself. Will wait for help. |
 02/13/2014Here's the impression in the carpet where the frame was sitting for almost a year, including three bumps where the holes were. |  02/13/2014Got help from my roommate, Becky Garrett. Put the first pane of glass in place. |  02/16/2014Made some supports to hold the frame up during assembly. The glass could probably support the frame, but I don't want to put extra stress on it. |
 02/16/2014The tops of the supports. |  02/16/2014Half of the frame, held up by the supports. |  02/16/2014Band clamps hold the frame tight to the edge of the glass. |
 02/18/2014There's an awkward little divot in the corner of the frame... |  02/18/2014...so I cut this piece of acrylic to fit. Who says you don't use geometry in real life? |  02/18/2014This is how it will fit in the corner, and start the first few rows of disks. |
 02/18/2014Here's the same 9 pieces, stuck in the corner of the frame. Fits like a charm. | 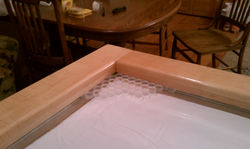 02/18/2014Additional rows of disks are stacking correctly. Very pleased, and very excited. |  02/19/20146 days later - Here's half of the bruise. The other half, on the back side of my arm, isn't quite as bad. |
 03/03/2014Getting ready to mount the GoPro camera. When they were building my townhome, I had them wire the living room for surround sound. Didn't put speakers in yet, but there are five holes in the ceiling for them. I threaded a string through each hole. |  03/03/2014Making a little basket to hold the camera. Starts with a piece of cardboard with some foam padding on it, and a hole for the lens. |  03/03/2014Then several more layers of cardboard, with holes big enough for the whole camera. (which is not very big) |
 03/03/2014Put the camera in the hole, and a rubber band to hold it in case the basket tips. |  03/03/2014Front view. |  03/03/2014Then I tied the strings to the basket. Right now, it's nearly centered over the map. But I can pull/loosen the strings to get shots at different angles. I'm sure there are tripods and booms and stuff to do this. But this whole setup cost $5. Just have to take it down every two hours, offload the new pictures, and swap the battery. |
 03/03/2014The first overhead shot. Those are my feet at the bottom of the picture. I'm standing on the floor, snapping the picture remotely via an app on my smartphone. Also note the book on the desk in the upper-left. It's holding down two of the strings that are holding up the camera. |  03/07/2014step 13 - Final assembly! Here's the first three rows of disks. |  03/08/2014The remote control for the GoPro is in my left hand. A click on the remote takes the picture. |
 03/20/2014Done drilling the stack on the left. That's 392 disks. Took 9 hours, spread over 9 days. I have to do that much two more times, then I'm DONE DRILLING. |  09/02/2014Done drilling disks for the map. Will make about 75 more for souvenirs. |
bottom of page